Showing posts with label DIY. Show all posts

Wednesday, August 22, 2012

How to re-use your K-cups!

For those of you who know me, there is nothing I love more than the perfect cup of coffee! I used to love my French Press until my husband gave me a Keurig for Mother's Day last year. The only drawback was the amount of garbage we were producing by throwing away the K-cups after one use. I think we have solved this problem. You can see our solution as you read on.  This is the model we have for at home:

It is a B130 in room brewing system.
 You add water for each use.

At school we have the Keurig elite.
I love this one because you can keep the reservoir filled with water for multiple uses.

We try to be kind to our environment in our household so we purchased the Keurig K-cup re-usable coffee filter and filter basket. I really love this thing!

I recently found this little gem on the Internet but have not tried it yet. Some of the reviews say it has sharp edges and is difficult to snap on. It retails for 19.99 but might be worth trying.

This is how we re-use our K-cups at home!
Here's what you will need:
 A pair of sharp scissors
Your favorite coffee, ground on the espresso setting
Rinsed and dried K-cups
Press'n Seal
After the initial brew with our K-cups we rinse them out and let them dry. If the inside of the cup is  perforated you must throw the K-cup away(very important).
Fill the K-cup to just below the rim about 1mm. Enough so that the Press' n Seal will not touch the coffee when you are covering it.
 
Each K-cup requires 2 cut pieces of Press' n Seal cut into squares.
After about 4 cuts with the Press'n Seal we wipe the scissors down because they can become sticky.
Pull tight the Press-n-Seal one layer at a time(very important)!
If it is not tight it will not brew properly.
Press edges onto K-cup.
We use the assembly line method with these and do them in a mass quantity to make it time efficient for us. We usually get 3-4 more brews from our K-cups when we re-use them.
Do you see the hole the Keurig punches in the cup when you use it?
On the second brew just line up the cup so it punches a new hole. I have never lined it up exactly so that you use the same hole. It might work I just have not tried it. Before closing the Keurig make sure to run your finger along the rim of the K-cup to ensure it is sealed (important if the one you are using has been sitting around) otherwise you will end up with coffee grounds in your coffee.

I would love to hear how this works for you!

Jen

Pin It

Thursday, July 12, 2012

Make your own Geodes!

My chidren have been fascinated with Geodes ever since we purchased one on vacation several years back. They look quite ordinary on the outside but when you break them open they are so beautiful on the inside.
This is our original Geode.
It is really beautiful on the inside (the picture does not do it justice).

This is the result of our Geode experiment at home.

It really is cool to see the transformation process.

Geode Recipe
Epsom Salts
2 cups warm/hot water
3 Eggs (broken make 6)
Food coloring
Large glass
Spoon
1. Save egg shells from baking or cooking, clean and let dry.
2. Save an old egg carton to hold the Geodes.
3. Fill glass with 2 cups of warm/hot water. 
4. Spoon in epsom salts until no more salts will dissolve (you will start to see epsom salts on the spoon as you bring it out of the warm water after stirring).
5. Pour epsom salt solution into egg shells (we found only filling them 1/4 to 1/2 way worked well)
6. Add several drops of food coloring to each egg. 
7. Store in a cool dry place so the liquid will evaporate (we kept them in the refrigerator).
8. It may take anywhere from 3 days to 1week for Geodes to form.
Then watch the magic begin!

Jen
Pin It

Monday, January 30, 2012

DIY Snowflakes!!

It has been a very strange winter here in New York. Typically by now the lake would be frozen and there would be plenty of snow outside. Alas, we have no snow outside so I decided to bring some inside with the hopes that Mother Nature will get the hint.

This is how the snowflakes look like at night.
You can find the printable templates I used here. You may need to enlarge the pattern.
If you google snowflake templates there are lots of different templates to choose from. When using these templates you cut out the gray area after it is folded into a small triangle.
First, you start with a hexagon.
I don't use the pattern with the lines anymore but it is helpful the first time you try it.

Then, you fold the hexagon in 1/2
Fold in 1/2 again

Fold triangle 2 more times and then draw on your template(if you are not using the gray one).

Cut it out

Then you have your snowflake!

This is how they look during the day (yep, no snow outside).

Happy Snowflakery!


Jen

Pin It

Monday, January 16, 2012

DIY Hanging Tea Light Holders!

Do you remember the branches I have in my urn outside our front door? Here is what I decided to do with them:
I think they are going to look really great at night!

I am using flameless tea lights so I don't have the fire department at our house anytime soon.

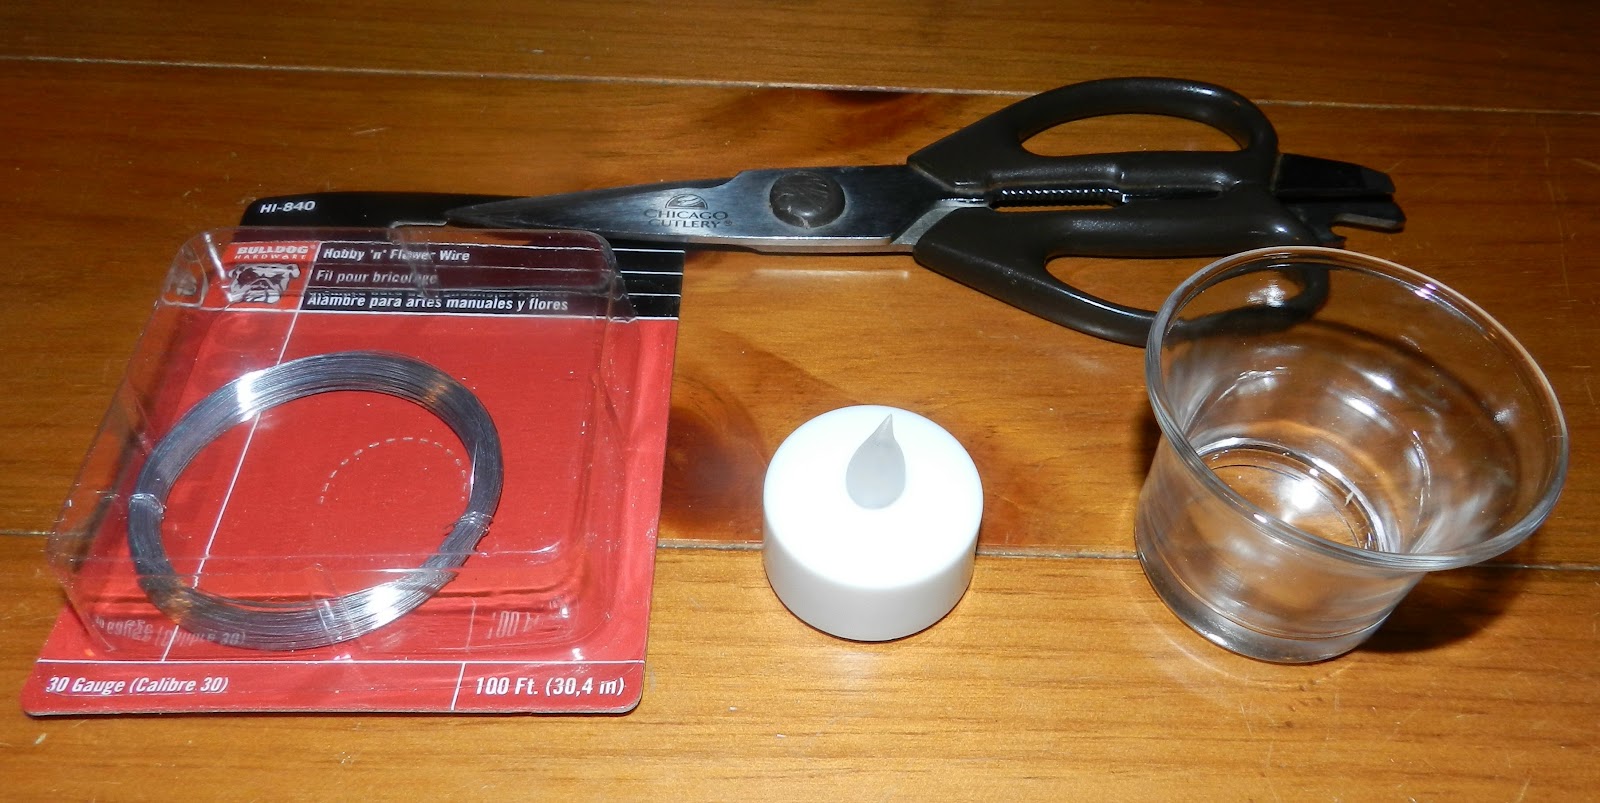
Here are all the supplies you will need:
Florist wire
Tea light holder (must be the kind with the larger rim, if it is straight up and down the wire will fall off)
Scissors
Tea lights
Cost: wire(.97 Walmart), tea-lights (.99 Michael's), tealights (6.79 Michael's, less if you have a coupon)
Wrap floral wire around tea light and then twist it around itself. You may have to pull tight on the long end to get it snug when you are done wrapping the wire.

Take long end of wire and loop it around existing wire on the opposite side.

Then twist the remaining wire. I did all this with my fingers but if you could use pliers if you prefer.

Voila!
You just made a hanging tea-light holder.


Jen


Pin It

Monday, November 7, 2011

Basting Oil Recipe!

Basting oil is one of those ingredients we can not live without in our kitchen.We go through it rapidly so we learned how to make it ourselves. Here are a few foods we use the basting oil with:

 Our crostini appetizer.
(recipe will be on a future post)

Roasting Brussel sprouts.
 Just toss with the basting oil add a little kosher salt and roast at 400 degrees in the oven for 35-40 min. I swear they are like eating candy.
Until I had them prepared this way Brussel Sprouts were not even in my vocabulary!!!!

Homemade Pizza dough.
(recipe future post)

 Mushrooms for in my omelets.

Here is what you will need:
Your favorite bottle to mix it in.
1/2 cup olive oil
1 minced garlic clove
2tsp. parsley
1/2 tsp. thyme
This is what it will look like after mixing.

After it has been sitting all the ingredients will go to the bottom.
I hope you like this recipe as much as we do.


Jen
Pin It